29 - Maps, Core Location, Background
MapKit for SwiftUI - 2023 WWDC
Apple docs: MapKit for SwiftUI
Apple released MapKit for SwiftUI with iOS 17 - much better integration with SwiftUI, etc.
Before that - only simplistic functionality was provided and more comprehensive usage was done using older MKMapView wrapped into UIViewRepresentable.
Initialize Map
Just add Map() element to your view.
Coordinates
extension CLLocationCoordinate2D {
    static let raekoda = CLLocationCoordinate2D(latitude: 59.436996, longitude: 24.7427928)
    static let itCollege = CLLocationCoordinate2D(latitude: 59.395446, longitude: 24.664294)
}
Markers
Basic marker
Marker("Raekoda", coordinate: .raekoda)
    .tint(.orange)
Color the marker balloon with .tint().
Basic marker, custom icon inside marker balloon
Marker("Raekoda", systemImage: "arrowshape.down.circle", coordinate: .raekoda)
    .tint(.orange)
Use SF Symbols app to explore all the possible icons.
Annotations
Annotation allows you to use a custom view to mark specific locations on a map.
Annotation("IT College", coordinate: .itCollege) {
    ZStack {
        RoundedRectangle(cornerRadius: 5)
            .fill(Color.purple)
        Text("🎓")
            .padding(5)
    }
}
The anchor option within Annotations provides you with the capability to adjust the marker’s anchor point in various directions relative to the provided coordinates.
You have the flexibility to use a combination of top, bottom, leading, right, or useCGPoint for precise control. By default, the anchor point is set to the center.
Annotation("IT College", coordinate: .itCollege, anchor: .bottom) {...}
Map Controls
Map()
    .mapControls {
            MapCompass()
            MapPitchToggle()
            MapScaleView()
            MapUserLocationButton()
    }
    .mapControlVisibility(.visible)
- MapCompass — Shows the current orientation of the map
- MapPitchToggle — Toggles between flat and pitched map
- MapPitchSlider (Mac only) — Slider to control the pitch of the map
- MapScaleView — Shows legend with distance information
- MapUserLocationButton — Centers the map on the user’s location
- MapZoomStepper (Mac only) — Button to adjust the map zoom level
- MapLocationCompass (WatchOS only) — Combined user location button and map compass
Map style
- Standard — Street map with road and names of places
- Imagery — Satellite image of the area
- Hybrid — Satellite image of the area including road and names of places
All map styles offer support for automatic, flat, and realistic (3D) elevation. Additionally, the standard and hybrid map styles also provide information on current traffic conditions.
Map()
    .mapStyle(.standard(elevation: .realistic, showsTraffic: true))
PolyLine
Map {
    MapPolyline(points: [MKMapPoint(.itCollege), MKMapPoint(.raekoda)])
        .stroke(.blue, lineWidth: 4)
}
or
Map {
    MapPolyline(coordinates:  [.itCollege, .raekoda])
        .stroke(.red, lineWidth: 4)
}
MapCircle, MapPolygon
Map {
    MapPolygon(coordinates: taltech)
        .foregroundStyle(.orange.opacity(0.60))
}

Map {
    MapCircle(center: .itCollege, radius: CLLocationDistance(250))
        .foregroundStyle(.orange.opacity(0.60))
        .mapOverlayLevel(level: .aboveLabels)

    MapCircle(center: .raekoda, radius: CLLocationDistance(350))
        .foregroundStyle(.teal.opacity(0.60))
        .mapOverlayLevel(level: .aboveRoads)
}
Core Location services
- SwiftUI continuously creates and destroys views. When there is a state change, all views depending on it will be destroyed and recreated. This happens quite aggressively throughout the lifecycle of SwiftUI apps
- SwiftUI provides us with specific property wrappers that store their values somewhere else rather than on the views directly.
Two of such wrappers are @StateObject and @ObservedObject. - ViewModel will be responsible for receiving Core Location updates and providing info about location to view
- Dealing with location requires user granted permission!
Minimal ViewModel
import Foundation
import CoreLocation

class LocationViewModel: NSObject, ObservableObject, CLLocationManagerDelegate {
    @Published var authorizationStatus: CLAuthorizationStatus

    private let locationManager: CLLocationManager

    override init() {
        locationManager = CLLocationManager()
        authorizationStatus = locationManager.authorizationStatus

        super.init()
        locationManager.delegate = self
        locationManager.desiredAccuracy = kCLLocationAccuracyBest
        locationManager.startUpdatingLocation()
    }
}
struct ContentView: View {
    @StateObject var locationViewModel = LocationViewModel()

    var body: some View {
        switch locationViewModel.authorizationStatus {
        case .notDetermined:
            AnyView(RequestLocationView())
                .environmentObject(locationViewModel)
        case .restricted:
            ErrorView(errorText: "Location use is restricted.")
        case .denied:
            ErrorView(errorText: "The app does not have location permissions. Please enable them in settings.")
        case .authorizedAlways, .authorizedWhenInUse:
            TrackingView()
                .environmentObject(locationViewModel)
        default:
            Text("Unexpected status")
        }
    }
}
Requesting access to location
    func requestPermission() {
        locationManager.requestWhenInUseAuthorization()
    }
This causes dialog to pop-up where user can allow location access. If denied - can later be changed through settings.
If there are issues in simulator (app not visible in settings), try this from terminal to reset the permissions (relaunc app again after).
xcrun simctl privacy booted reset all
Also add callback to change authorization property in vm.
func locationManagerDidChangeAuthorization(_ manager: CLLocationManager) {
    authorizationStatus = manager.authorizationStatus
}
RequestLocationView & ErrorView
struct RequestLocationView: View {
    @EnvironmentObject var locationViewModel: LocationViewModel

    var body: some View {
        VStack {
            Image(systemName: "location.circle")
                .resizable()
                .frame(width: 100, height: 100, alignment: .center)
                .foregroundColor(.blue)
            Button(action: {
                locationViewModel.requestPermission()
            }, label: {
                Label("Allow tracking", systemImage: "location")
            })
            .padding(10)
            .foregroundColor(.white)
            .background(Color.blue)
            .clipShape(RoundedRectangle(cornerRadius: 8))
            Text("We need your permission to track you.")
                .foregroundColor(.gray)
                .font(.caption)
        }
    }
}
struct ErrorView: View {
    var errorText: String

    var body: some View {
        VStack {
            Image(systemName: "xmark.octagon")
                .resizable()
                .frame(width: 100, height: 100, alignment: .center)
            Text(errorText)
        }
        .padding()
        .foregroundColor(.white)
        .background(Color.red)
    }
}
TrackingView
struct TrackingView: View {
    @EnvironmentObject var locationViewModel: LocationViewModel

    var coordinate: CLLocationCoordinate2D? {
        locationViewModel.lastSeenLocation?.coordinate
    }

    var body: some View {
        VStack {
            VStack {
                PairView(
                    leftText: "Latitude:",
                    rightText: String(coordinate?.latitude ?? 0)
                )
                PairView(
                    leftText: "Longitude:",
                    rightText: String(coordinate?.longitude ?? 0)
                )
                PairView(
                    leftText: "Altitude",
                    rightText: String(locationViewModel.lastSeenLocation?.altitude ?? 0)
                )
                PairView(
                    leftText: "Speed",
                    rightText: String("\(locationViewModel.lastSeenLocation?.speed ?? 0) m/s")
                )
                PairView(
                    leftText: "Distance",
                    rightText: String(locationViewModel.distance)
                )
            }
            .padding()
        }
    }
}
EnvironmentObject
@EnvironmentObject is a simpler way of using @ObservedObject on multiple sub-views. Rather than creating some data in view A, then passing it to view B, then view C, then view D before finally using it, create data in view A and put it into the environment so that views B, C, and D will automatically have access to it.
Like @ObservedObject, never assign a value to an @EnvironmentObject property. Instead, it should be passed in from elsewhere, and ultimately initialized with @StateObject to create it .
Environment objects must be supplied by an ancestor view – if SwiftUI can’t find an environment object of the correct type you’ll get a crash. This applies for previews too!
Receive location updates
Full viewmodel
class LocationViewModel: NSObject, ObservableObject, CLLocationManagerDelegate {
    @Published var authorizationStatus: CLAuthorizationStatus
    @Published var lastSeenLocation: CLLocation?

    @Published var distance: Double = 0


    private let locationManager: CLLocationManager

    override init() {
        locationManager = CLLocationManager()
        locationManager.allowsBackgroundLocationUpdates = true

        authorizationStatus = locationManager.authorizationStatus

        super.init()
        locationManager.delegate = self
        locationManager.desiredAccuracy = kCLLocationAccuracyBest
        locationManager.startUpdatingLocation()
    }

    func requestPermission() {
        locationManager.requestWhenInUseAuthorization()
    }

    func locationManagerDidChangeAuthorization(_ manager: CLLocationManager) {
        authorizationStatus = manager.authorizationStatus
    }

    func locationManager(_ manager: CLLocationManager, didUpdateLocations locations: [CLLocation]) {
        if let lastSeenLocation = lastSeenLocation, let curLocation = locations.first {
            distance = distance + lastSeenLocation.distance(from: curLocation)
        }

        lastSeenLocation = locations.first
    }

}
NB! You can include as many optional bindings and Boolean conditions in a single if statement as you need to, separated by commas. If any of the values in the optional bindings are nil or any Boolean condition evaluates to false, the whole if statement’s condition is considered to be false.
if let lastSeenLocation = lastSeenLocation, let curLocation = locations.first {
            distance = distance + lastSeenLocation.distance(from: curLocation)
}
is the same as
if let lastSeenLocation = lastSeenLocation {
    if let curLocation = locations.first {
        distance = distance + lastSeenLocation.distance(from: curLocation)
    }
}
PairView
struct PairView: View {
    let leftText: String
    let rightText: String

    var body: some View {
        HStack {
            Text(leftText)
            Spacer()
            Text(rightText)
        }
    }
}
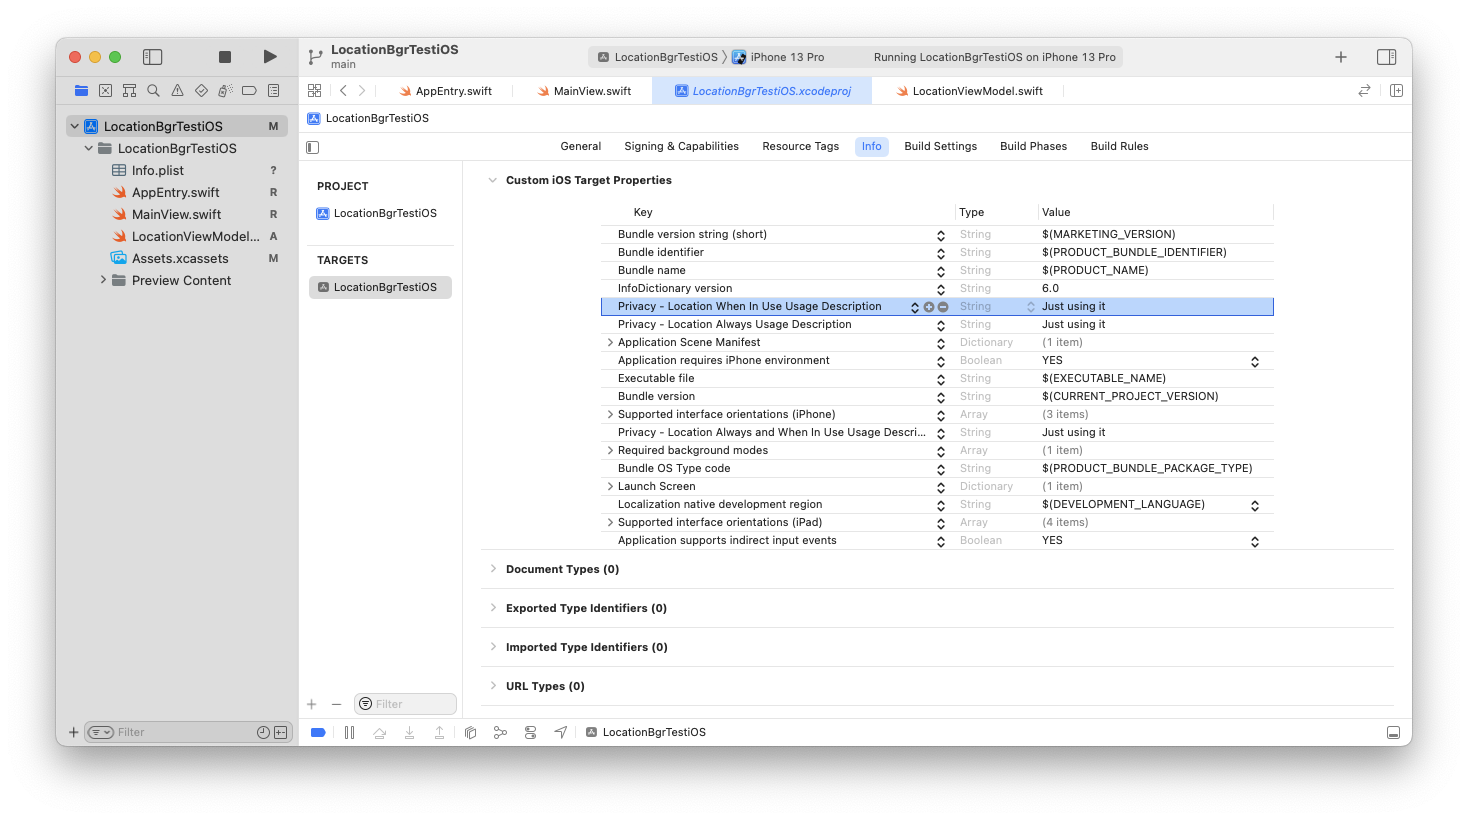
App settings for location usage
Depending on location usage needed, these keys are mandatory in Info.plist (xml file with app settings).
Values are used to inform user in permission granting dialog, why app needs location access.
NSLocationAlwaysAndWhenInUseUsageDescription
NSLocationWhenInUseUsageDescription
NSLocationAlwaysUsageDescription
NB! Info.plist was removed in XCode 13. Add keys via XCode UI.
Receiving location updates while in background
Keepin app running in background is extremely limited and controlled in iOS. Luckiliy, location updates is one of the features that is allowed.
Set up neccessary settings in XCode / Info.plist. Navigate to capabilities section and click "+" on upper right corner.
Choose Bakground Modes - new section is addedd to settings.
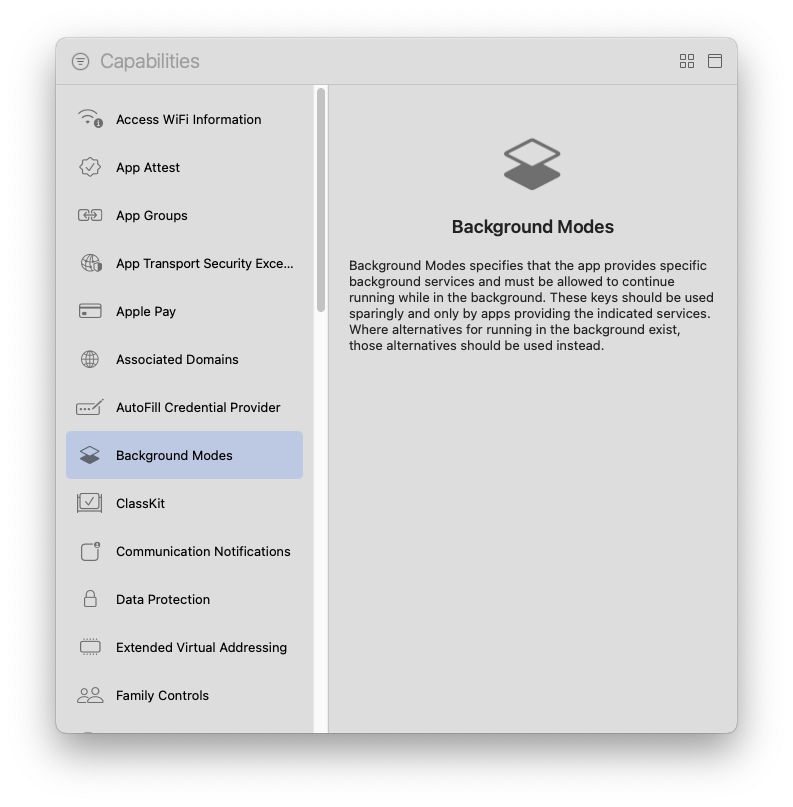
Activate Location updates.
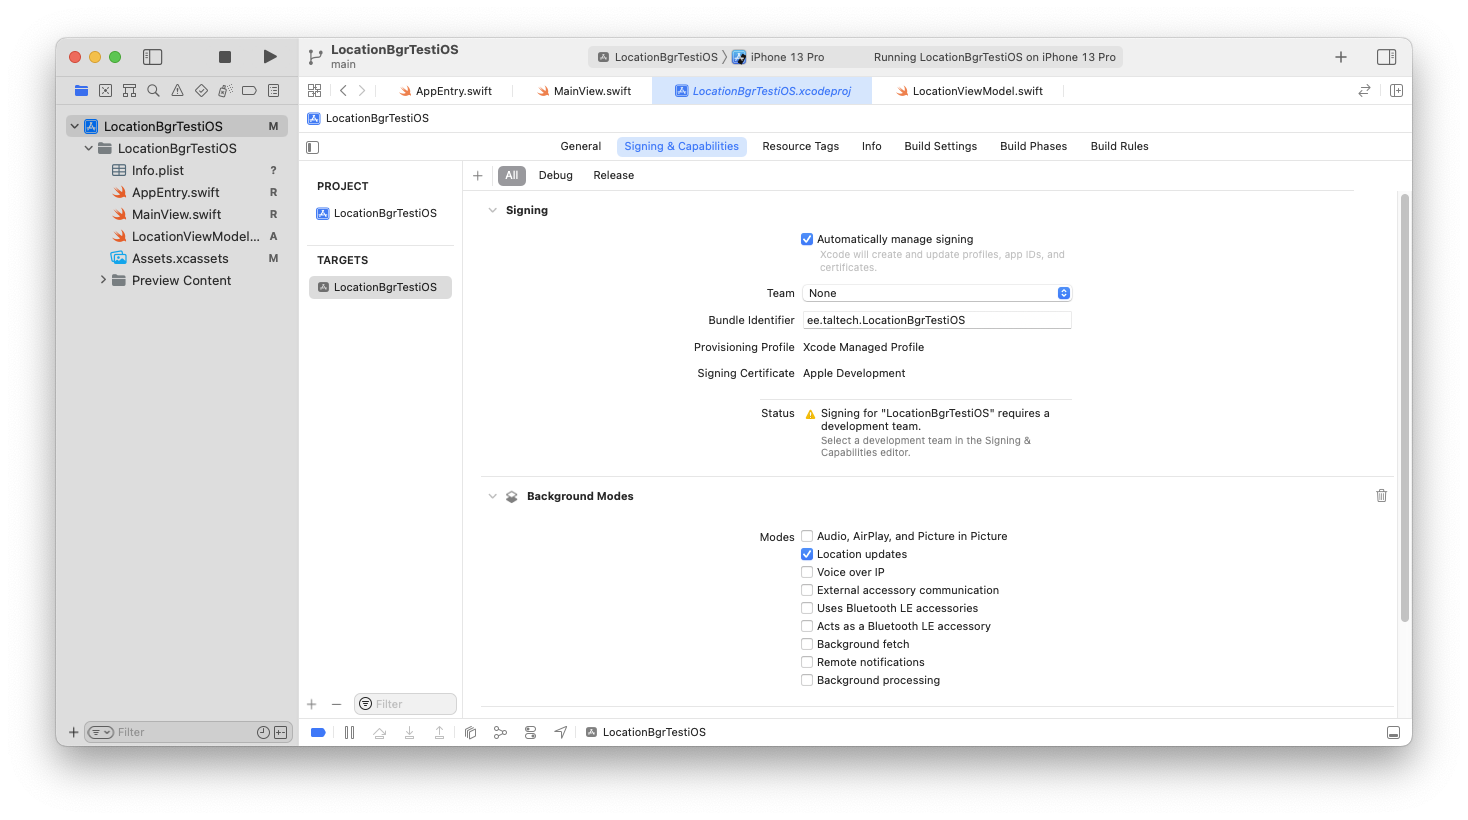
also, you need to
locationManager.allowsBackgroundLocationUpdates = true
and
func requestPermission() {
    locationManager.requestAlwaysAuthorization()
}
Now when app starts to listen for location updates while in foreground and then enters background - app is kept running.
Links
- https://developer.apple.com/documentation/corelocation/requesting_authorization_for_location_services
- https://developer.apple.com/documentation/corelocation/cllocationmanager/1620551-requestalwaysauthorization
- https://developer.apple.com/documentation/corelocation/getting_the_user_s_location/using_the_standard_location_service
- https://developer.apple.com/documentation/corelocation/getting_the_user_s_location/handling_location_events_in_the_background
Using Google maps in SwiftUI
https://developers.google.com/codelabs/maps-platform/maps-platform-ios-swiftui